

TUTORIAL: Over-grouting our Fireplace
The first DIY at the cabin...and why I was nervous to try this $150 fix, that truly changed everything

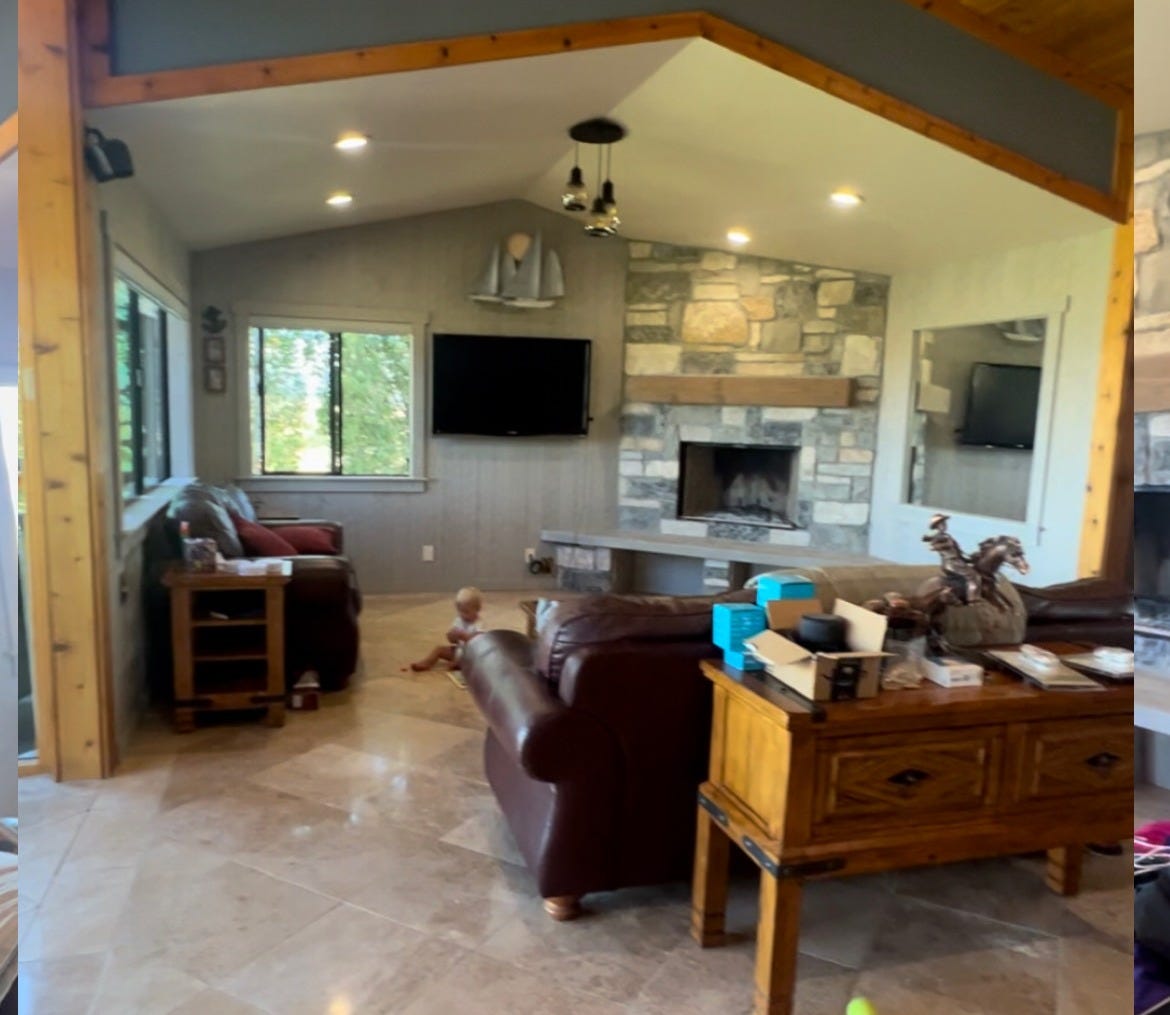
There’s nothing quite like a stone fireplace in a cabin—but ours needed some love. The stones were too dark, with bright orange tones, the grout lines felt harsh, and it didn’t have that soft, timeless look I was hoping for. We could have removed all the stone and replaced it, but that would have been expensive and time consuming. So, after spending HOURS researching and scouring the internet for ideas I came across a term called “over grouting”
The more images I saw of this over grouted look I LOVED it. I decided to give overgrouting a try- it seemed like simple DIY technique that would make our fireplace feel warm, old-world, and high-end—without the high-end price tag.
What is Overgrouting?
Overgrouting is exactly what it sounds like—applying fresh grout over existing stone and grout lines to create a softer, more natural look. Instead of recessed, gray shadowy grout lines, you get an organic bright white grout line that beautifully blends into the stone. It’s a method that I came across on pinterest and multiple people had shared how much they loved their transformation including Chris Loves Julia, and after seeing their results, I knew I had to try it.
How I Did It
✔ Time: 5.5 hours
✔ Cost: Less than $150
✔ Difficulty Level: Beginner-friendly

I used white large stone and tile mortar, and a piping bag to apply it. I mixed the mortar in a bucket with quickrete concrete dye to create a more “Creamy” color (but don’t think this step was really necessary). After mixing the mortar I scooped the mortar into the piping bag.
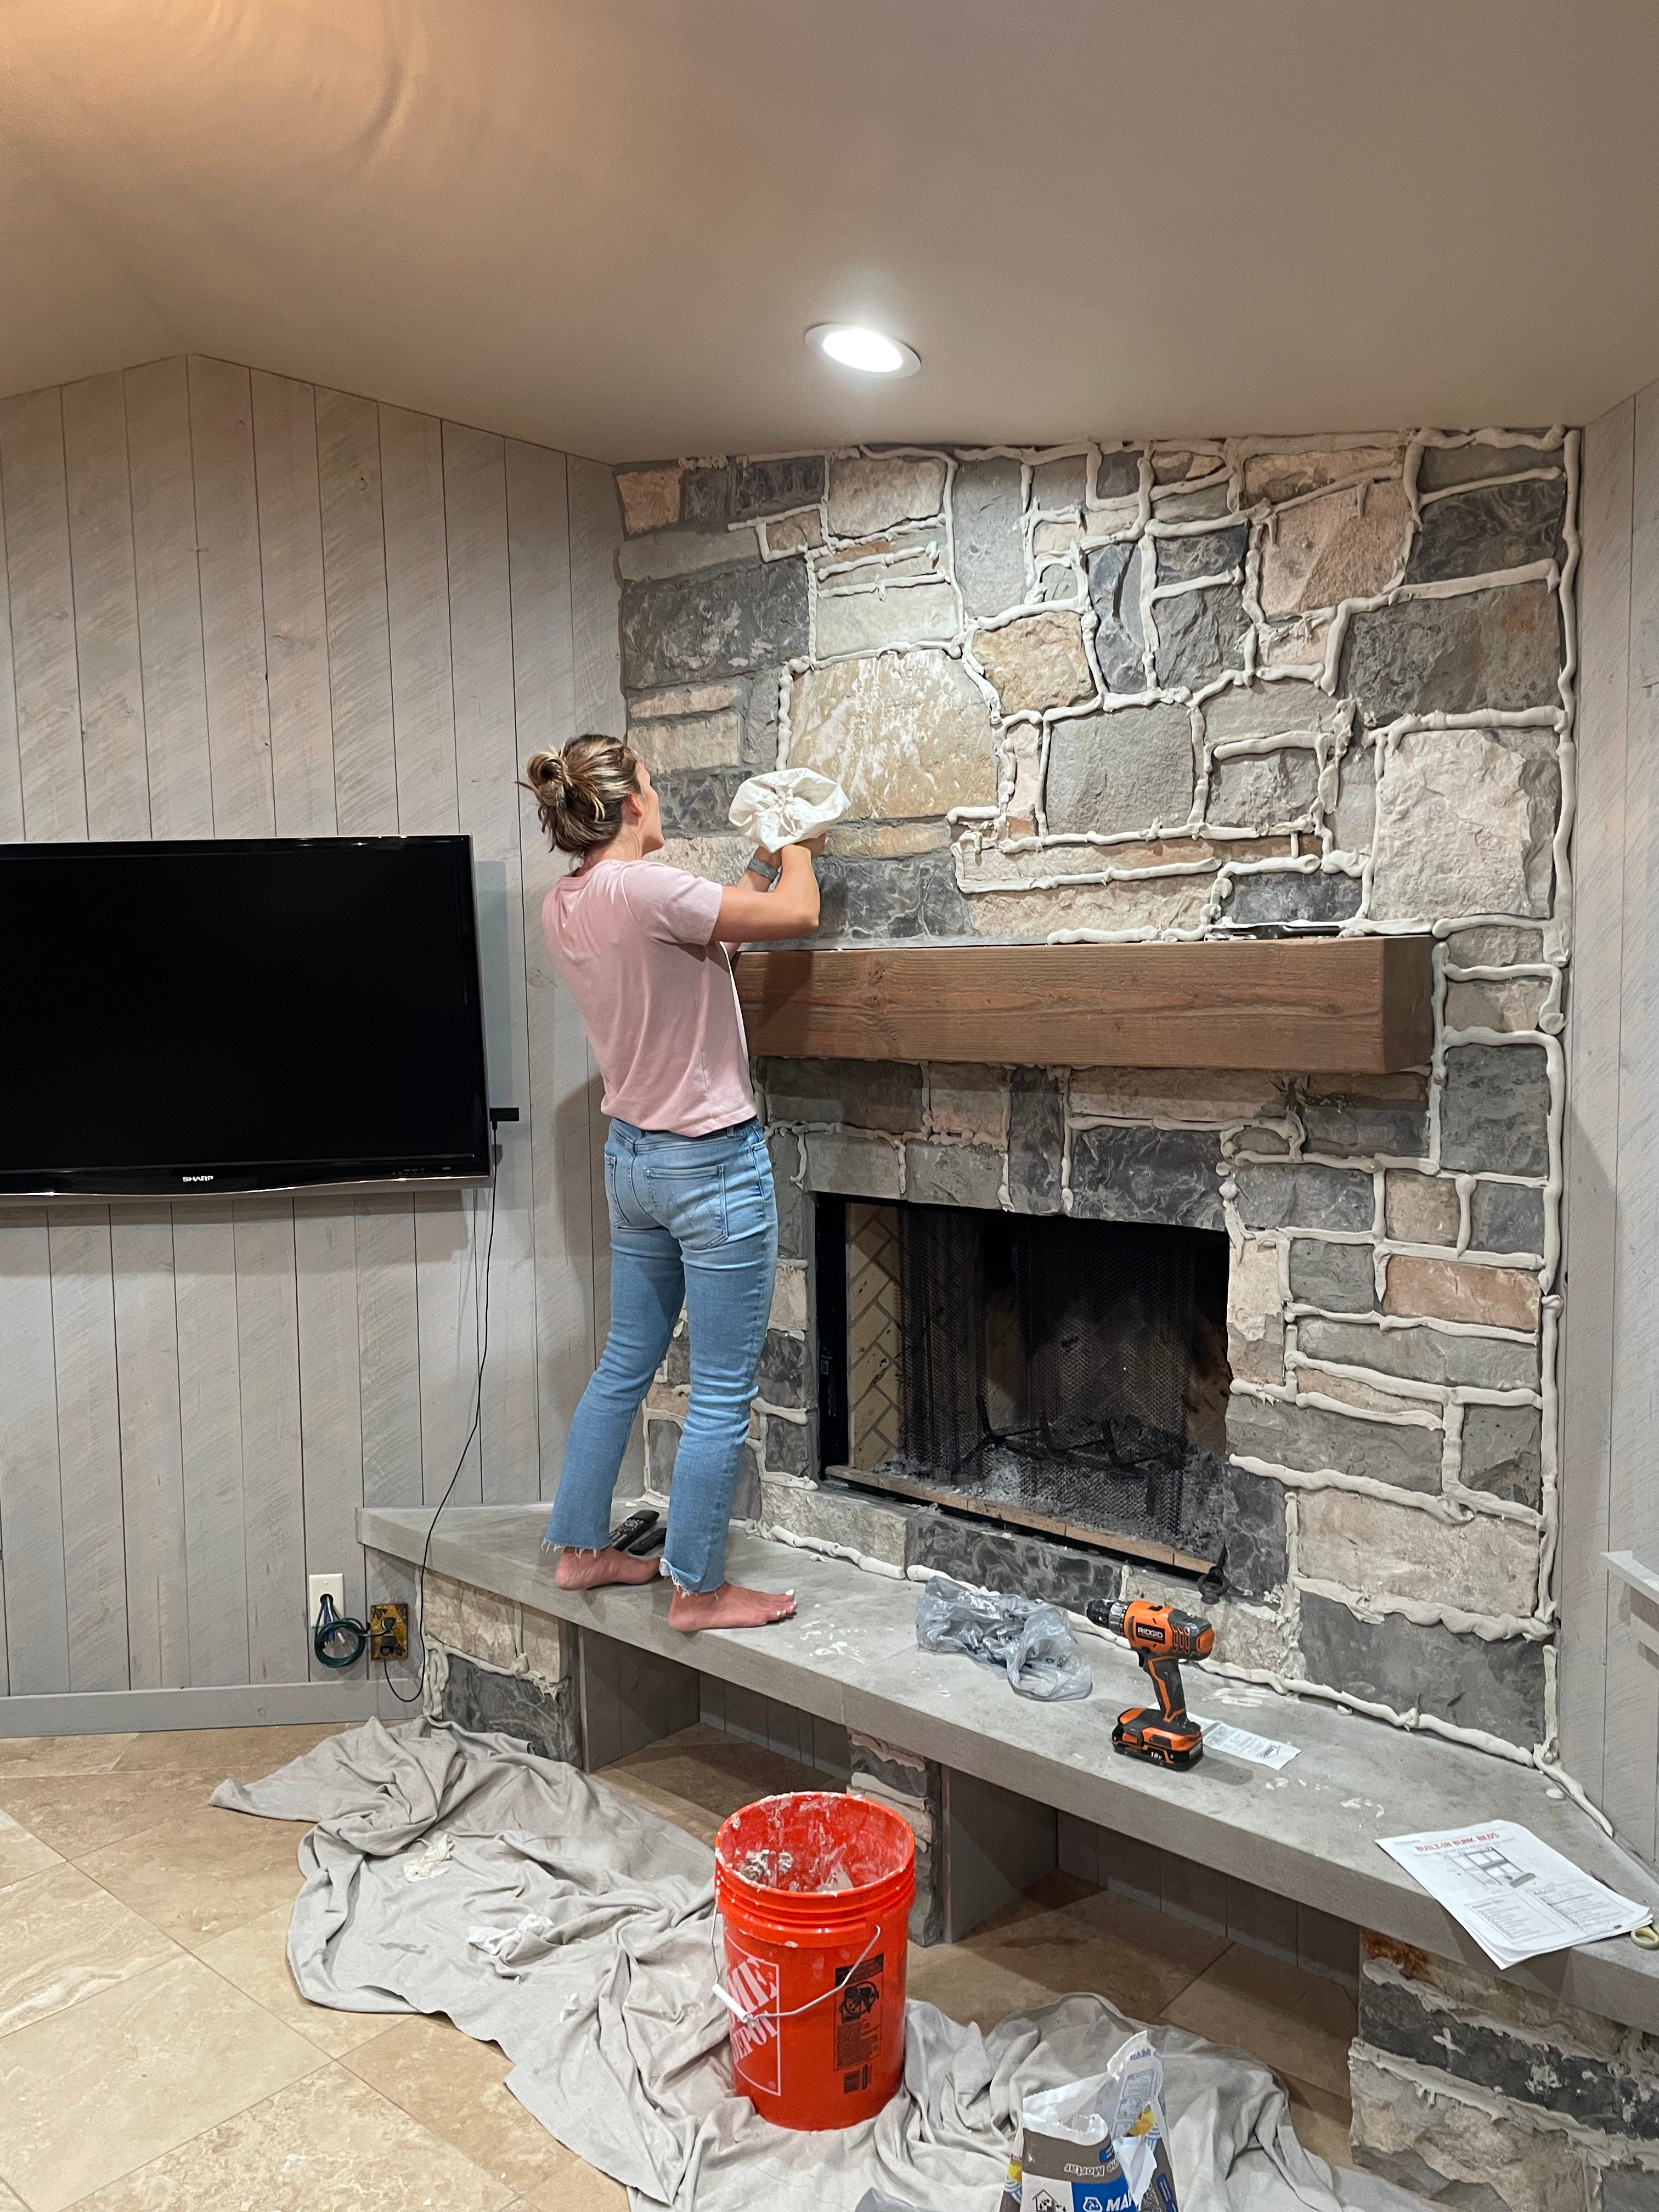
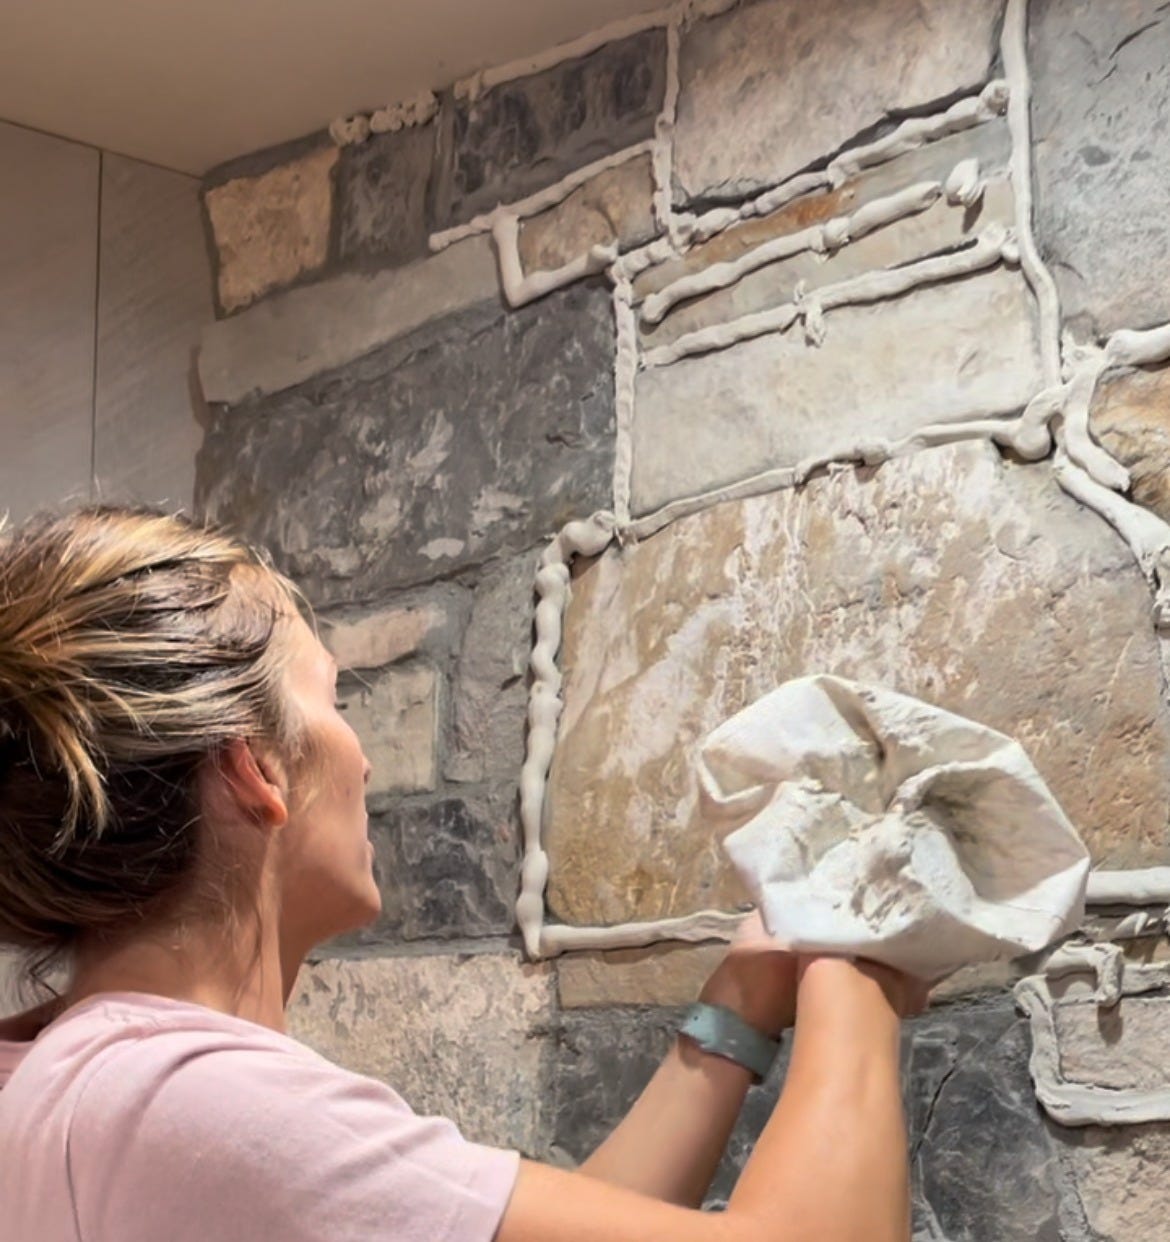
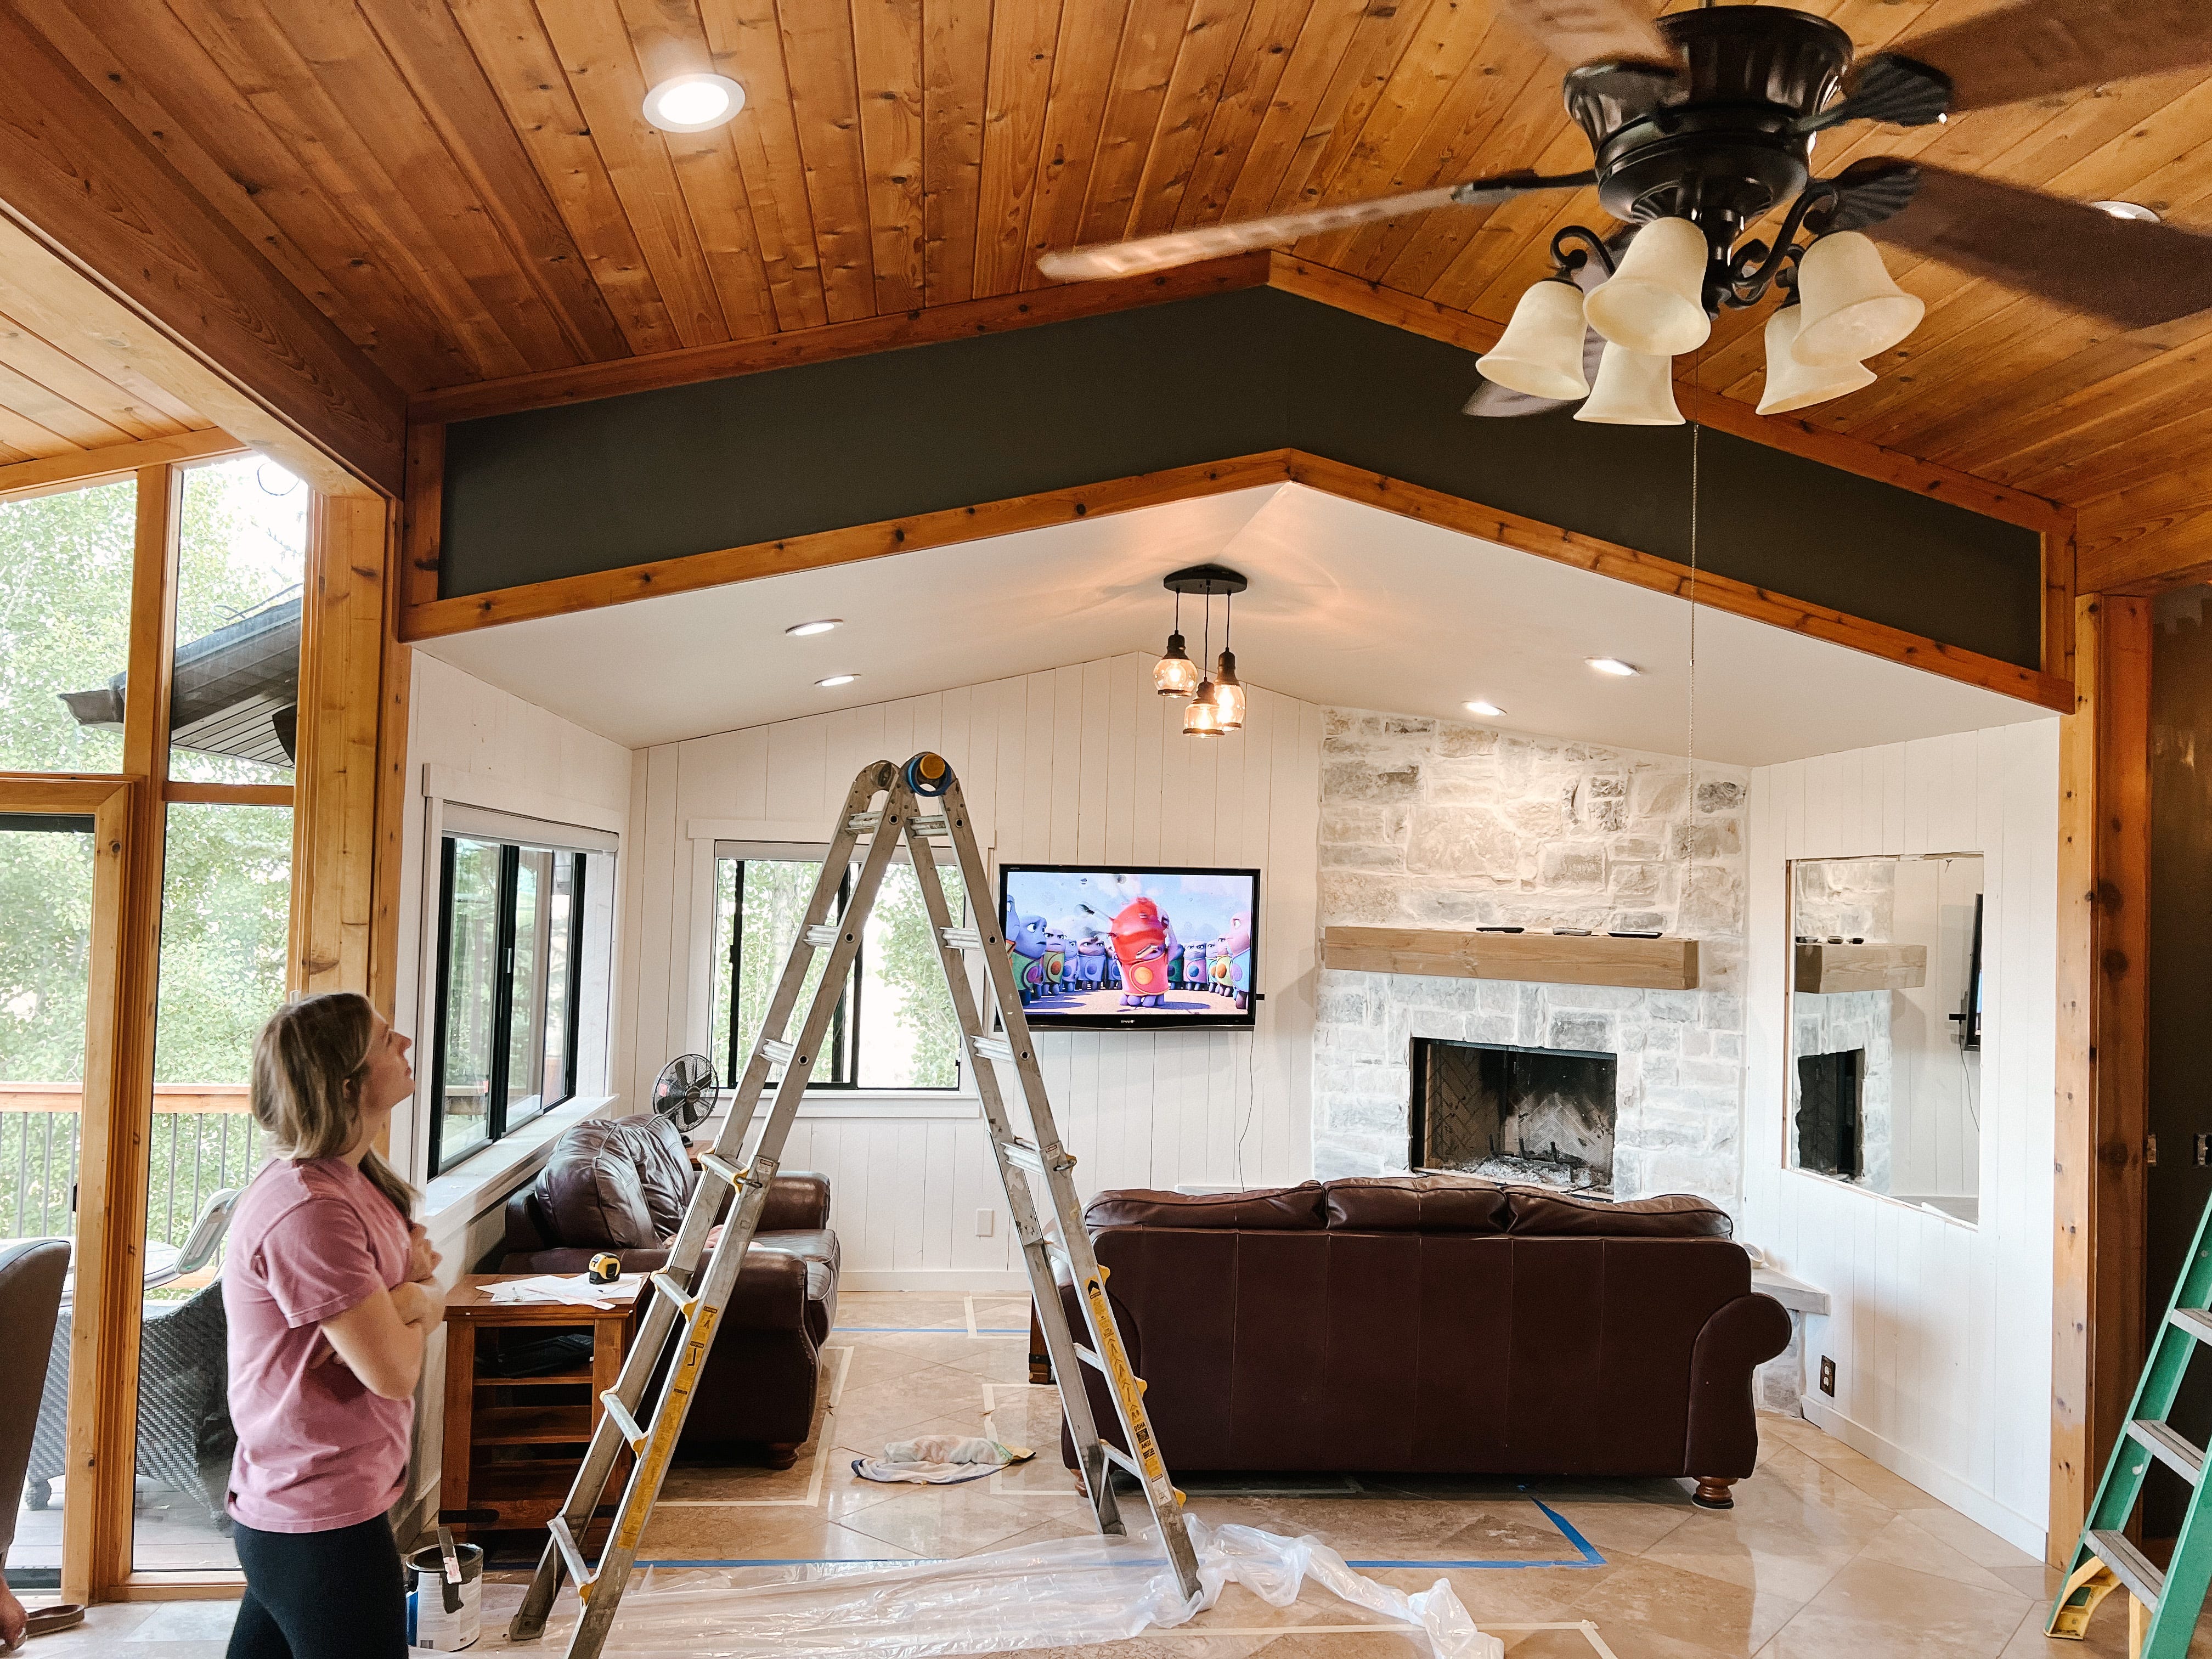
I piped the mortar into every grout line with extra dripping onto the stone. I would wipe off an excessive amount but really embraced the organic touch of just letting the mortar kind of fall where it did. I questioned myself the entire process…
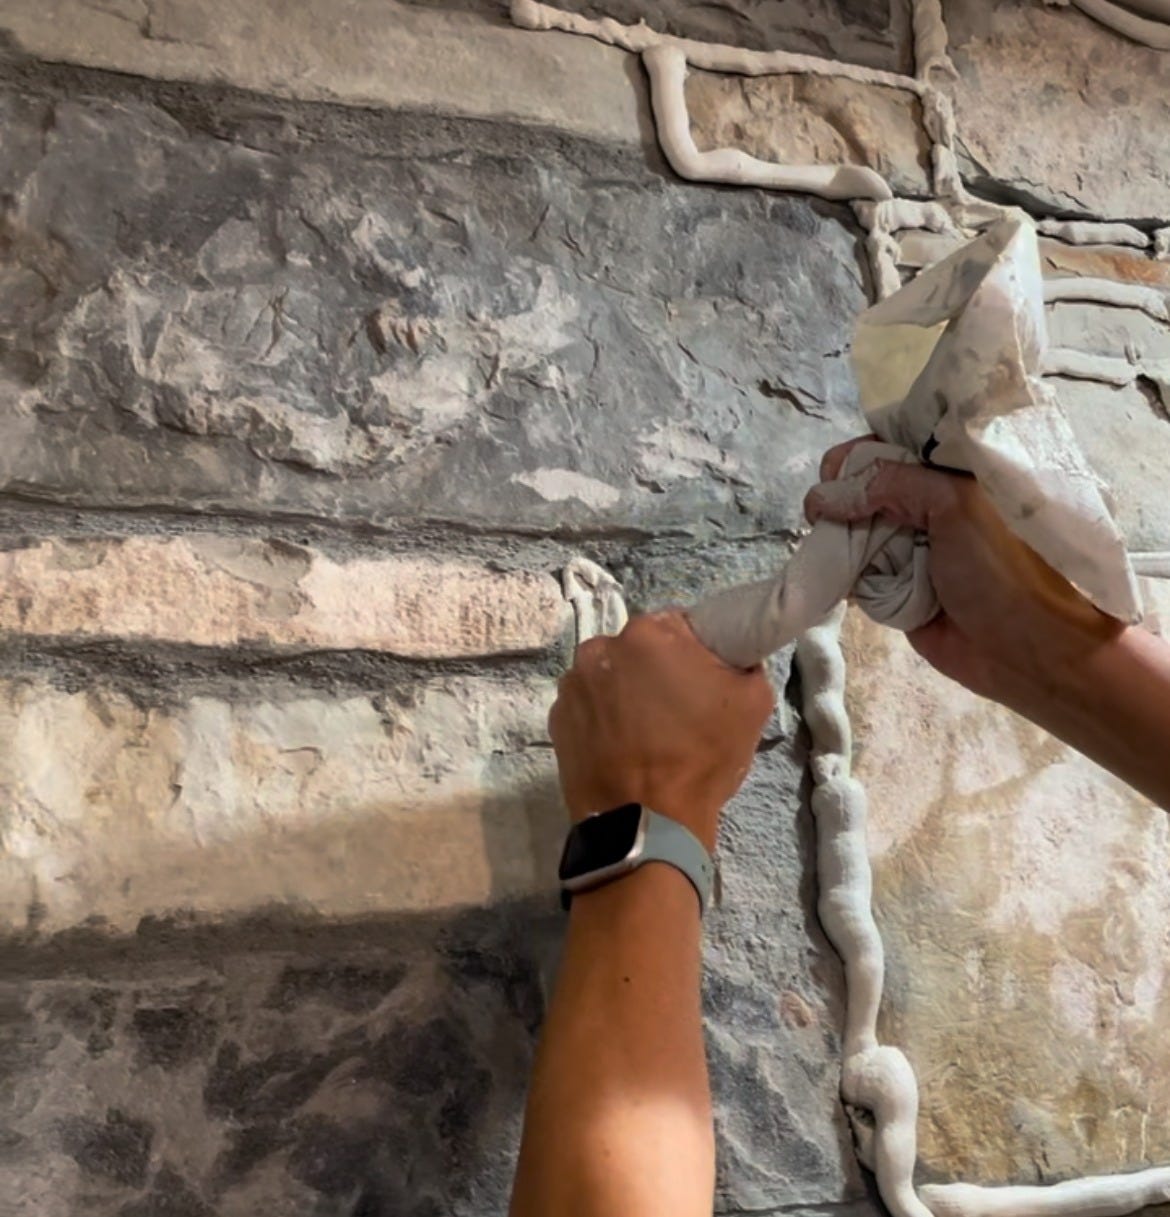
Was this really the right thing to do, and if it looks terrible how do I get the dried mortar off? You know the panic that sets in after its too late to go back :) But as the mortar started to dry and then I could begin brushing it smooth with the craft brush it started to be come everything I was hoping it would be.
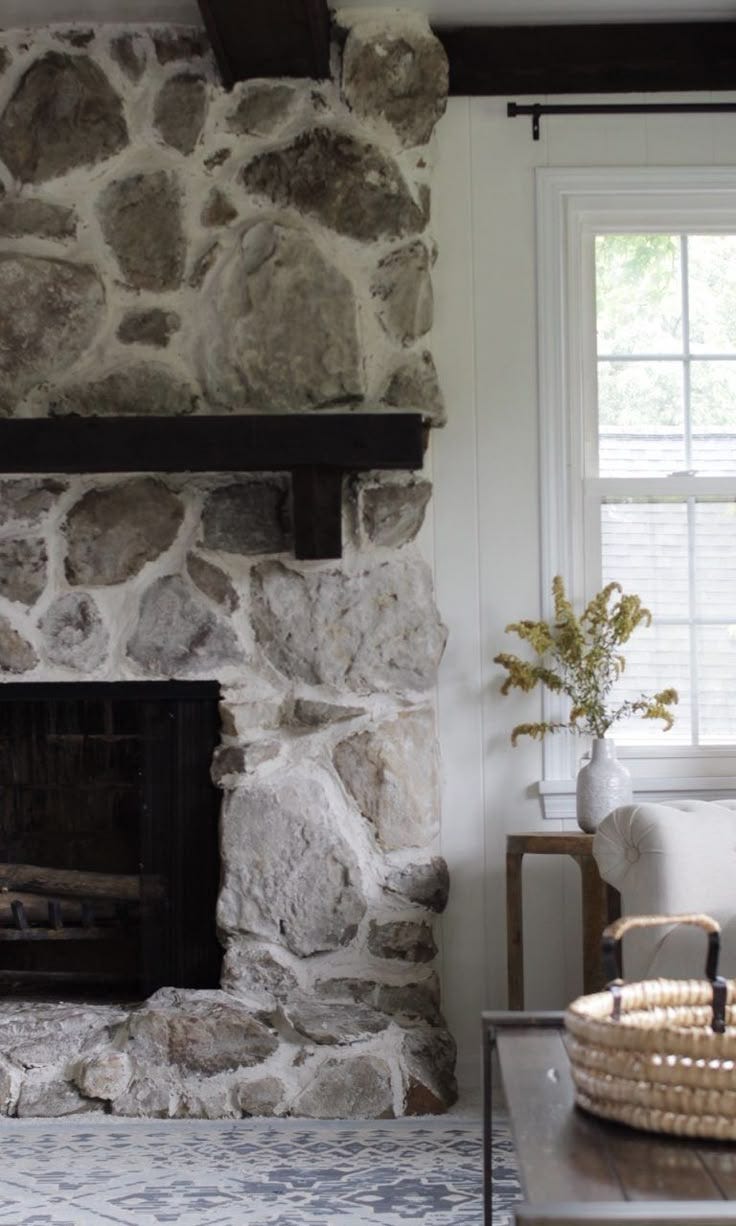
Before & After
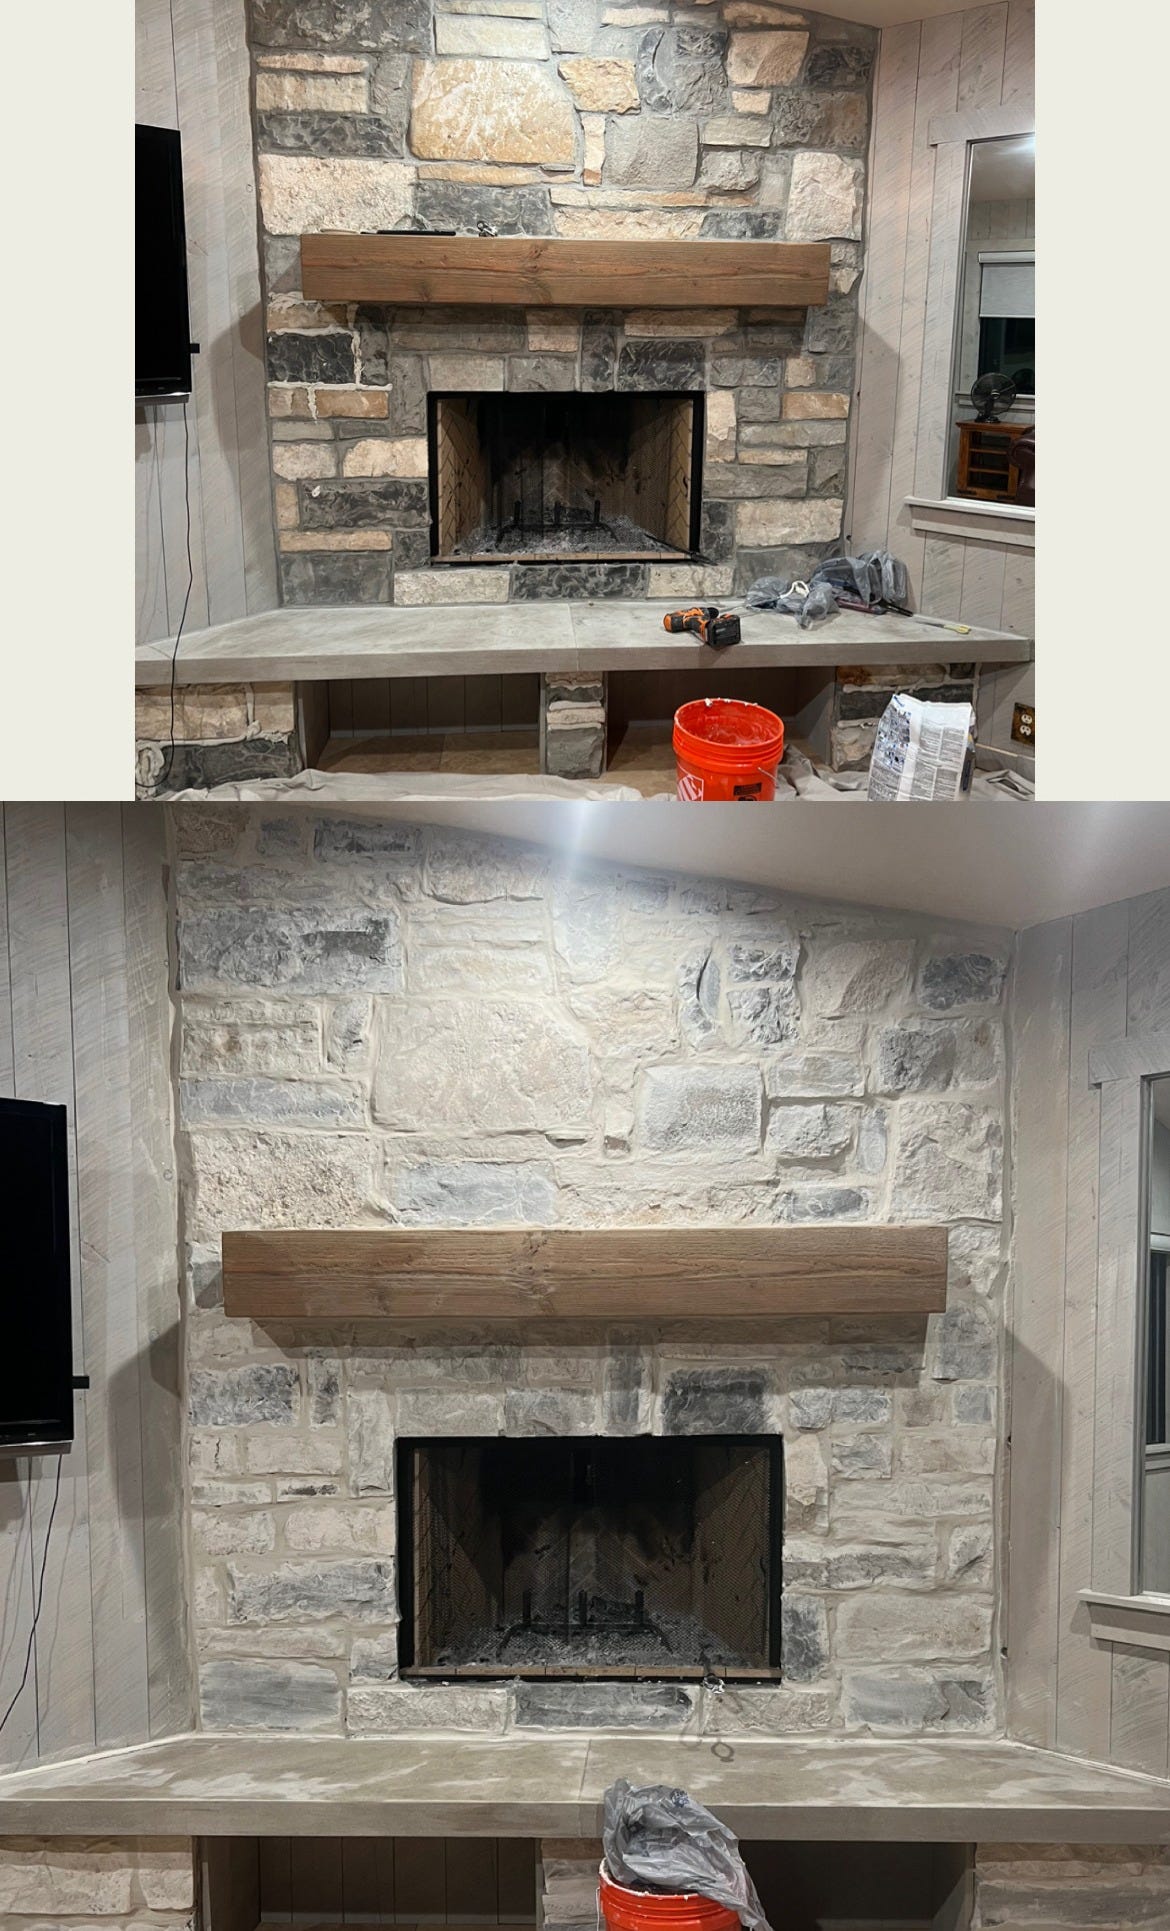
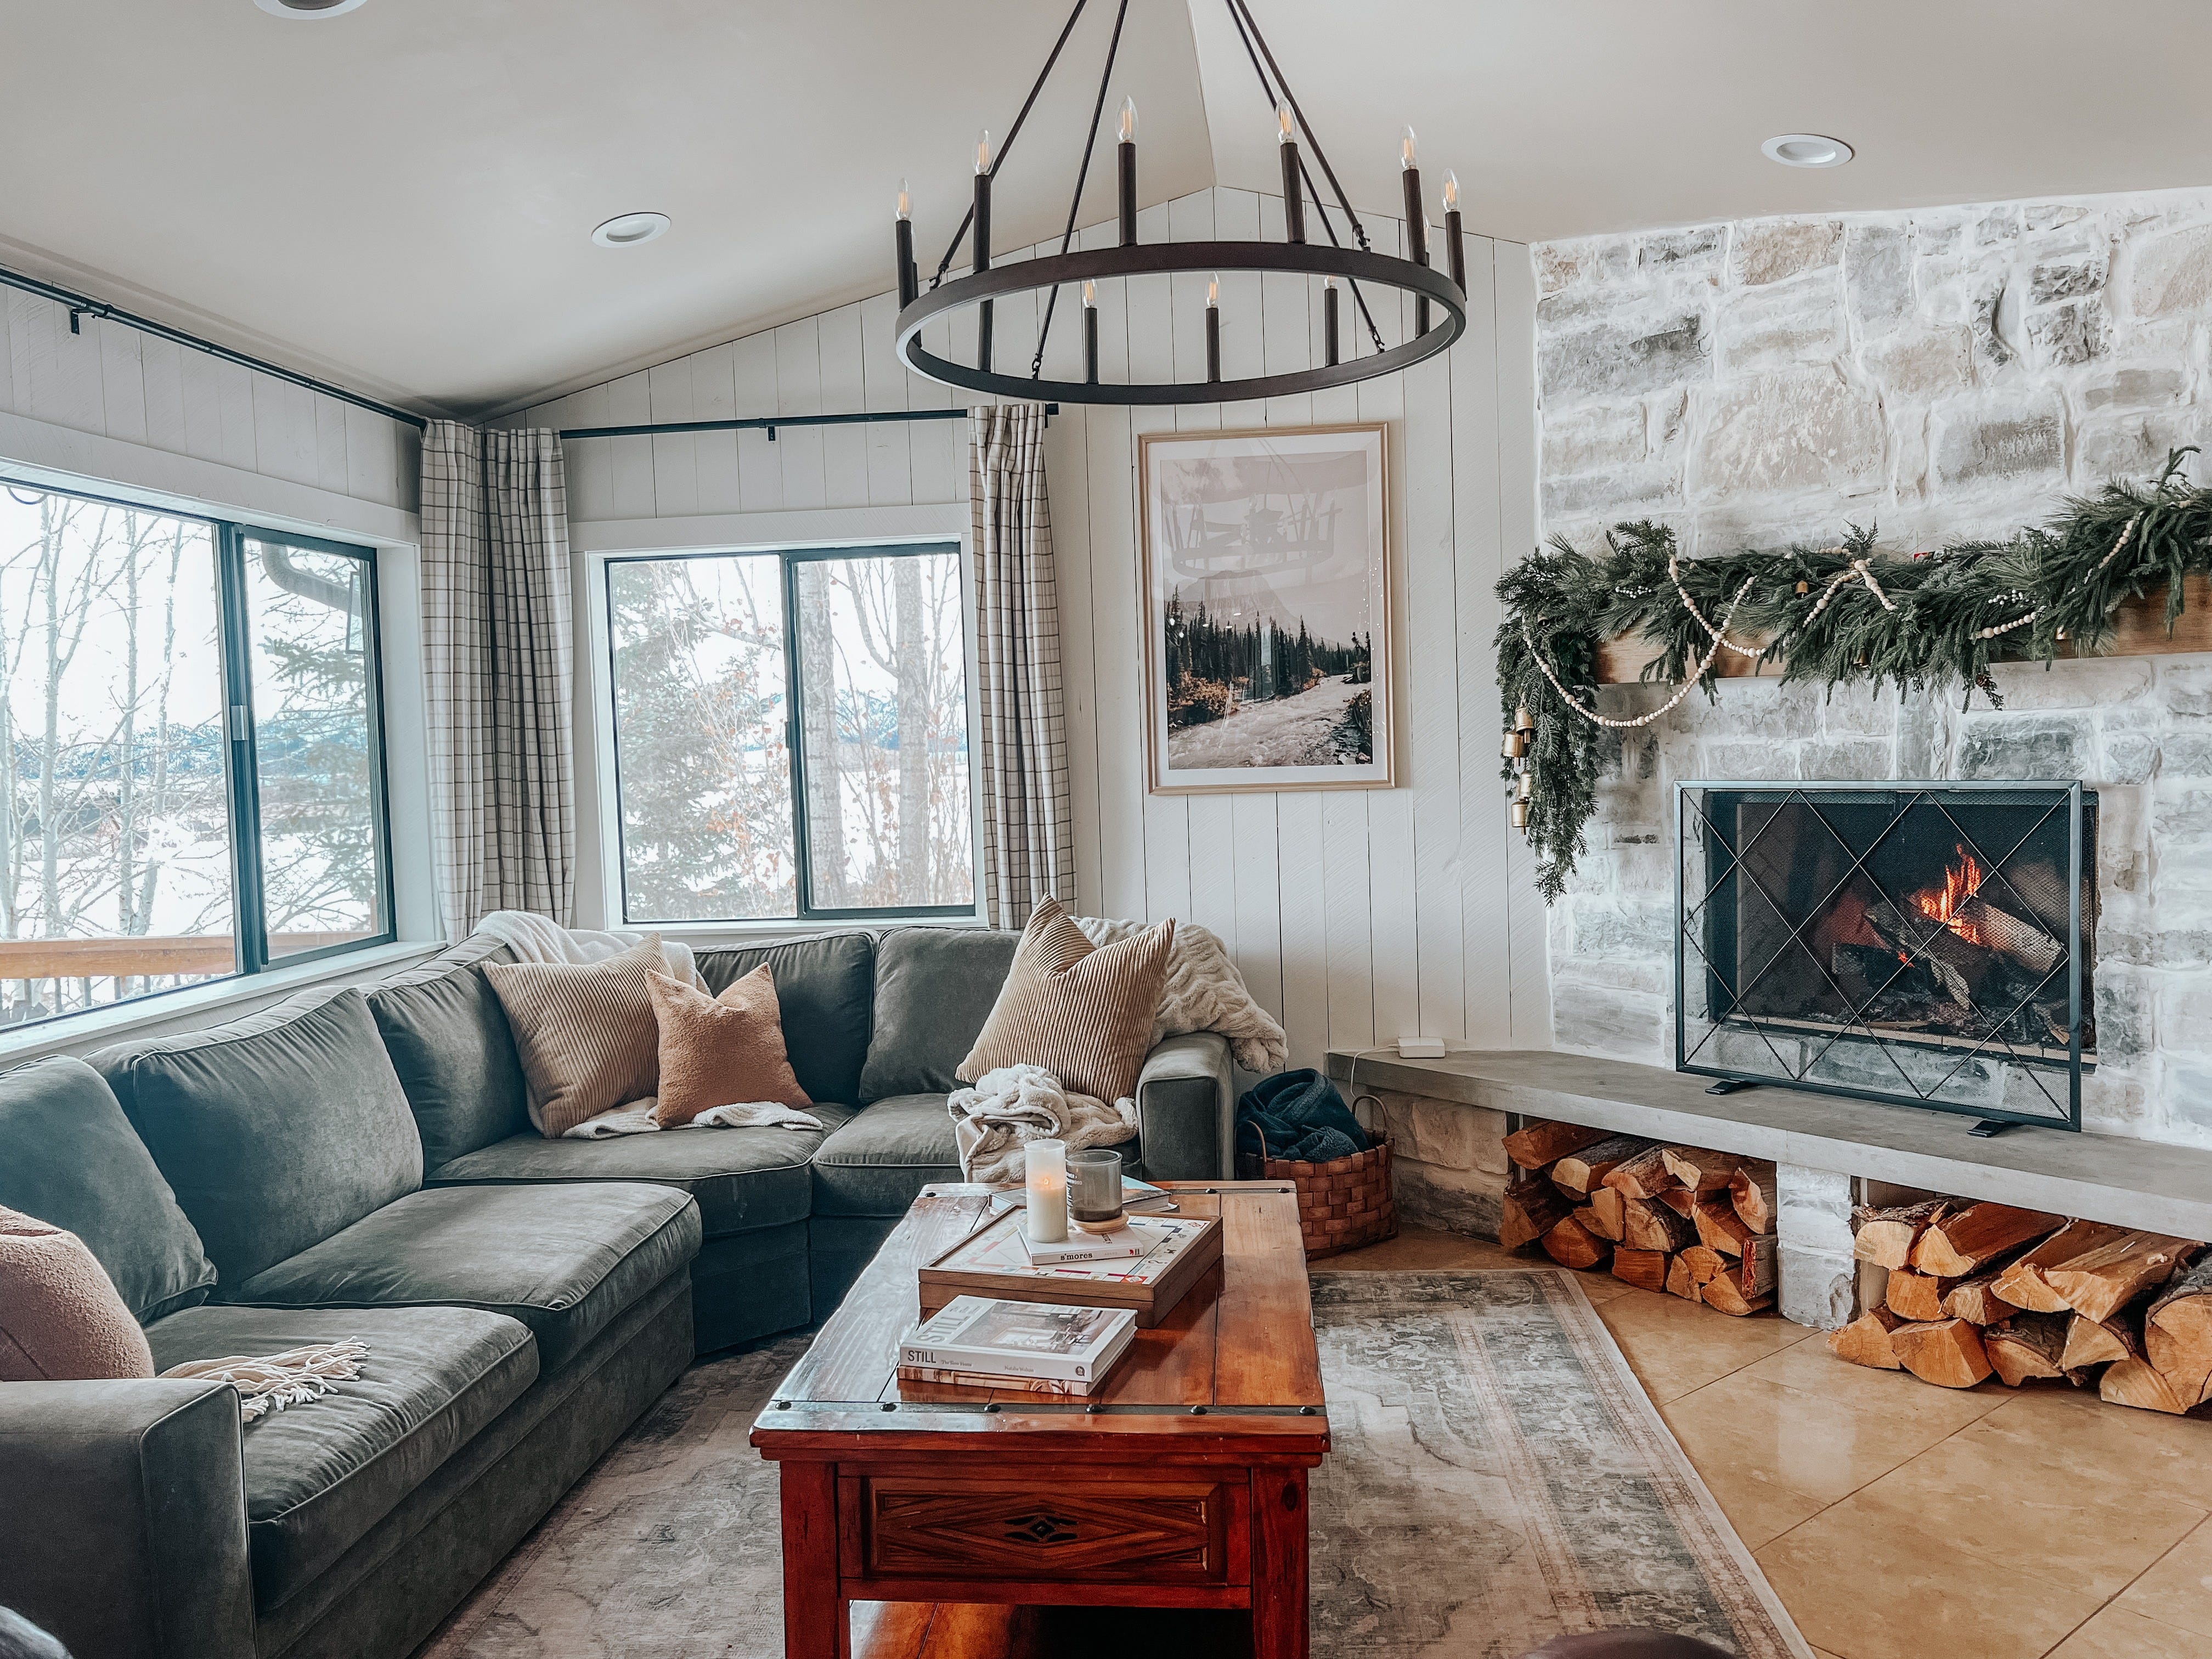
The transformation was instant. The heavy contrast of the dark grout disappeared, and in its place was a soft, lived-in look that made the fireplace feel like it had been there forever.
Would I Do It Again?
Absolutely. This might be one of the highest-impact, lowest-cost DIYs I’ve ever tackled. If you’ve got a stone fireplace that feels a little too stark or dated, overgrouting is a game-changer.
Thinking about trying this? Let me know in the comments! And if you want more budget-friendly home projects like this, drop your email below to stay in the loop.